I’m started a new position at Logitech, as Solution Engineer. In my role I need to present and “sell” the fantastic Logitech Video portfolio. In order to demonstrate the devices, I would need to be able to showcase each product from remote. As still a lot of customers like to work from remote.
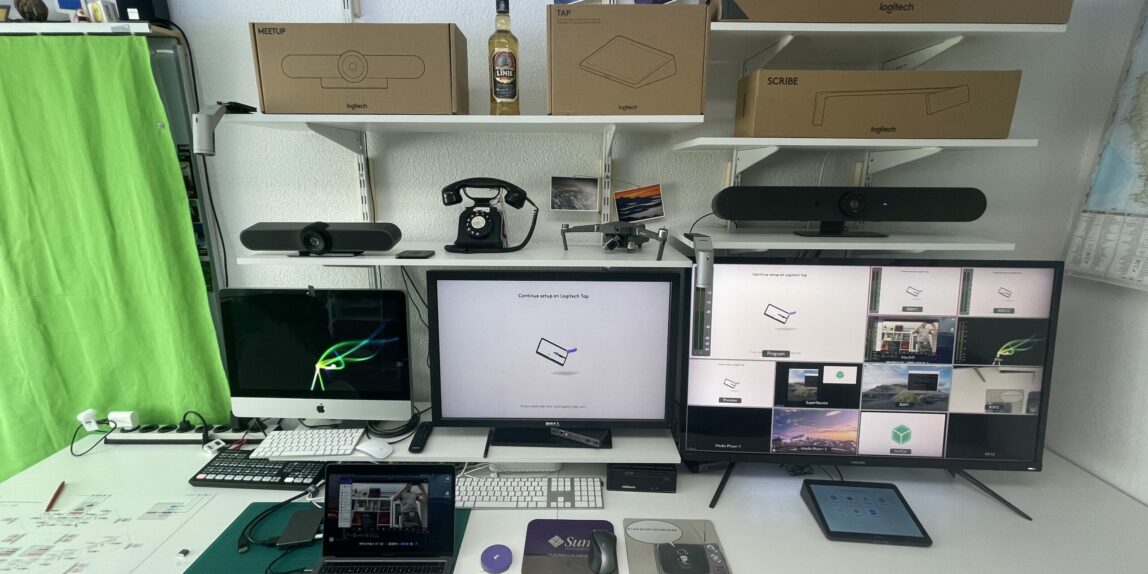
 …This is how it could/should look like when I’m done..well then I will just add more..
Hardware
- ATEM Mini Extreme ISO
- Raspberry Pi4
- StreamDeck XL
- 8×8 HDMI Matrix
- 2x Cisco SX10
- lot’s of HDMI cabels
Logitech Hardware
| Item | Details |
|---|---|
| Rally Bar Mini | Rally Bar Mini Power supply AC power cord HDMI cable USB cable Remote control Lens caps for main lens and AI Viewfinder |
| Rally Bar | Rally Bar Power supply AC power cord HDMI cable USB cable Remote control Lens caps for main camera and AI Viewfinder |
| Ralley Plus | Rally Rally Camera Rally Display Hub Rally Table Hub Rally Speaker (x1) Rally Mic Pod (x1) Remote control USB Type C to USB Type C USB Type A to USB Type B CAT6A Ethernet cable HDMI Type A (x2) A/C cables (x2) Power Supplies (x2) Documentation Logitech Rally Plus Rally Camera Rally Display Hub Rally Table Hub Rally Speaker (x2) Rally Mic Pod (x2) Remote control USB Type C to USB Type C USB Type A to USB Type B CAT6A Ethernet cable HDMI Type A (x2) A/C cables (x2) Power Supplies (x2) |
| MeetUp | MeetUp ConferenceCam Remote control USB cable: 16 ft (5 m) Power supply Wall mount and hardware |
| Swytch | Swytch Hub Swytch Extender Swytch Connector with 4.9 ft / 1.5 m USB Cable 100-240v Swytch Hub Power Supply 100-240v Swytch Extender Power Supply 16.4ft/ 5 m USB 3.0 Cable 7.2 ft /2.2 m USB 3.0 Cable 6.5 ft / 2.0 m HDMI 2.0 Cable Mounting accessories |
| Scribe & Scribe Button | Camera Share Button Dongle Transceiver 100-240v Power Supply with International Adaptor Set 16.4 ft (5.0 m) Cat5e Cables x 2 Cable Clips x 2 Camera Installation Kit |
| Tap Cat5 | Tap Touch Controller Cat5e Kit - Logitech Tap Receiver - Dongle Transceiver - 100-240v Power Supply with International Adaptor Set - 2.97 m Cat5e Cable - 7.0 m Cat5e Cable HDMI 1.4a cable 2.0 m VESA Mounting Screws (4) Microfiber Cloth |
| Tap IP - white | Tap IP Touch Controller |
| Room Mate | Logitech RoomMate Power supply AC cable Mounting plate Remote control |
| Tap Scheduler | Logitech Tap Scheduler Multi-surface mount (glass/drywall) Corner mount accessory Mullion mount Mounting hardware |
Software
- Bitfocus Companion App running on the Raspi4
- Companion Satellite
- OBS running on my main PC
Wiring
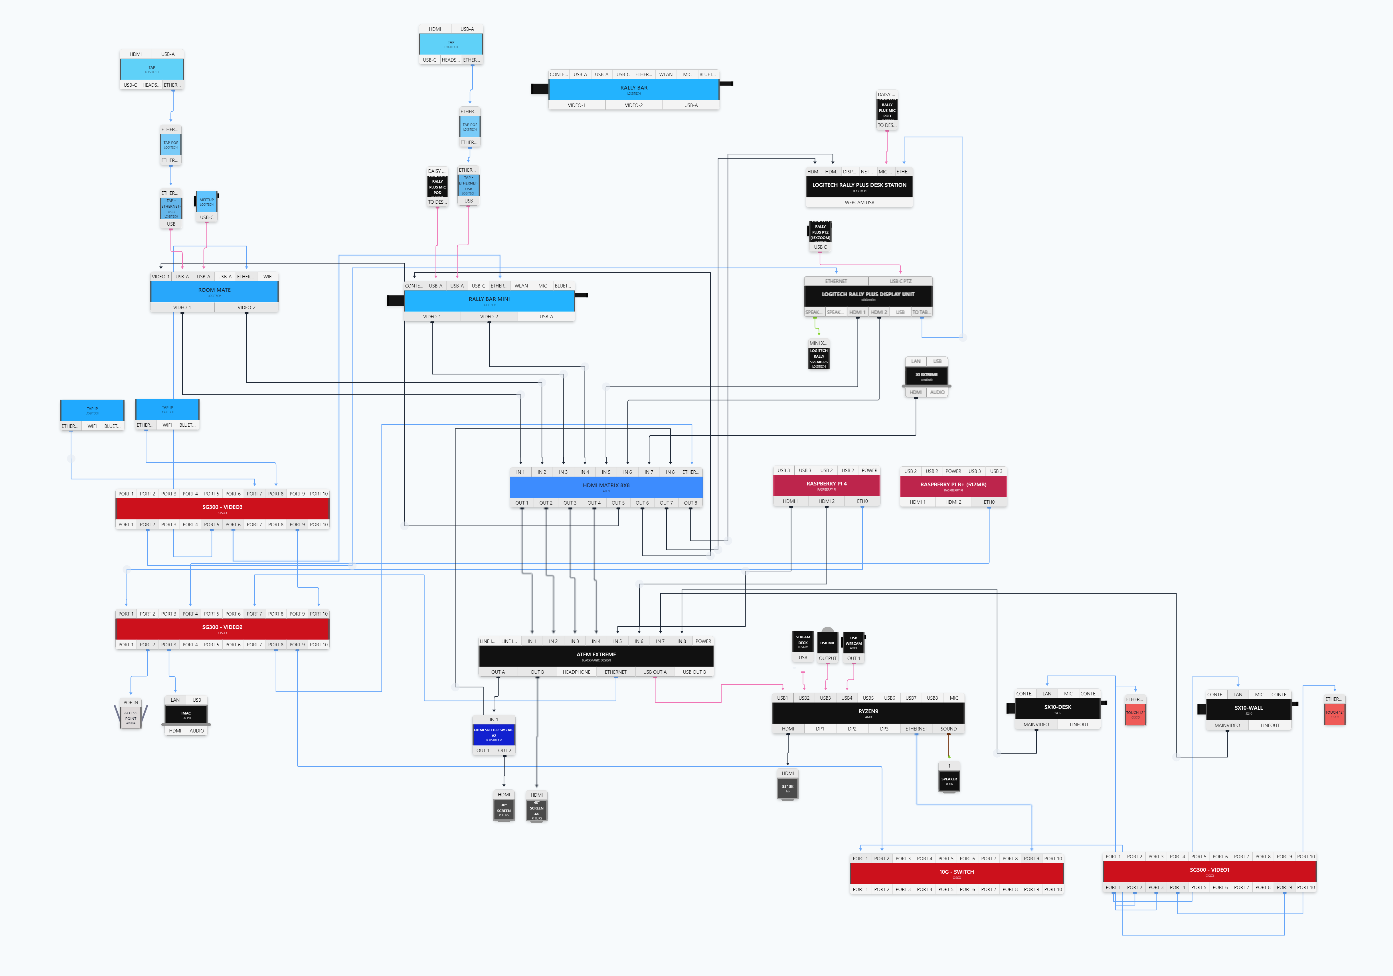
The idea behind the setup is the present the portfolio of Logitech to my customers, so I would need to be able to demonstrate the devices and capabilities. As I don’t have and don’t want to plater the wall with screens, I decided to use a HDMI Matrix and ATEM to mix all together.
Each Logitech Camera has two HDMI-out and a HDMI-in. This makes three signals to process. As I can share the content source for all cameras, I only need a HDMI-splitter function. Further I had troubles with the HDMI in on the ATEM, which seamed to loose the sync on reboot of the cameras. The ATEN (not ATEM) 8×8 Matrix works fine with the cameras, as it’s emulating EDID which fixes the sync issue (at least this is what I see/think).
On Port 1-7 I have each the two outputs of the cameras, and port 8 is the input of the PC for the desktop sharing.
From the ATEN to the ATEM, I’ve routed three cables, normally this would be screen 1, screen 2 and the content. Since I can control the Matrix and the ATEM from the StreamDeck, I can switch any camera output to screen.
| ATEN 8x8 Matrix In | Out | Port | ATEM mini Extreme In | Out |
|---|---|---|---|---|
| Rally Bar Mini 1 | ATEM - 3 | 1 | SX-10 Wall | 30" screen |
| Rally Bar Mini 2 | ATEM - 4 | 2 | SX-10 Desk | 43" screen |
| Rally Bar 1 | ATEM - 5 | 3 | ATEN - 1 | USB-C - PC |
| Rally Bar 2 | 4 | ATEN - 2 | USB-C - HDD | |
| Rally (RoomMate) 1 | Rally Bar Mini - content | 5 | ATEN - 3 | |
| Rally (RoomMate) 2 | Rally Bar - content | 6 | AirDrop | |
| MeetUp - RoomMate 1 | Rally - content | 7 | Raspberry 1 | |
| PC-Content | RoomMate - content | 8 | Raspberry 2 |
Control
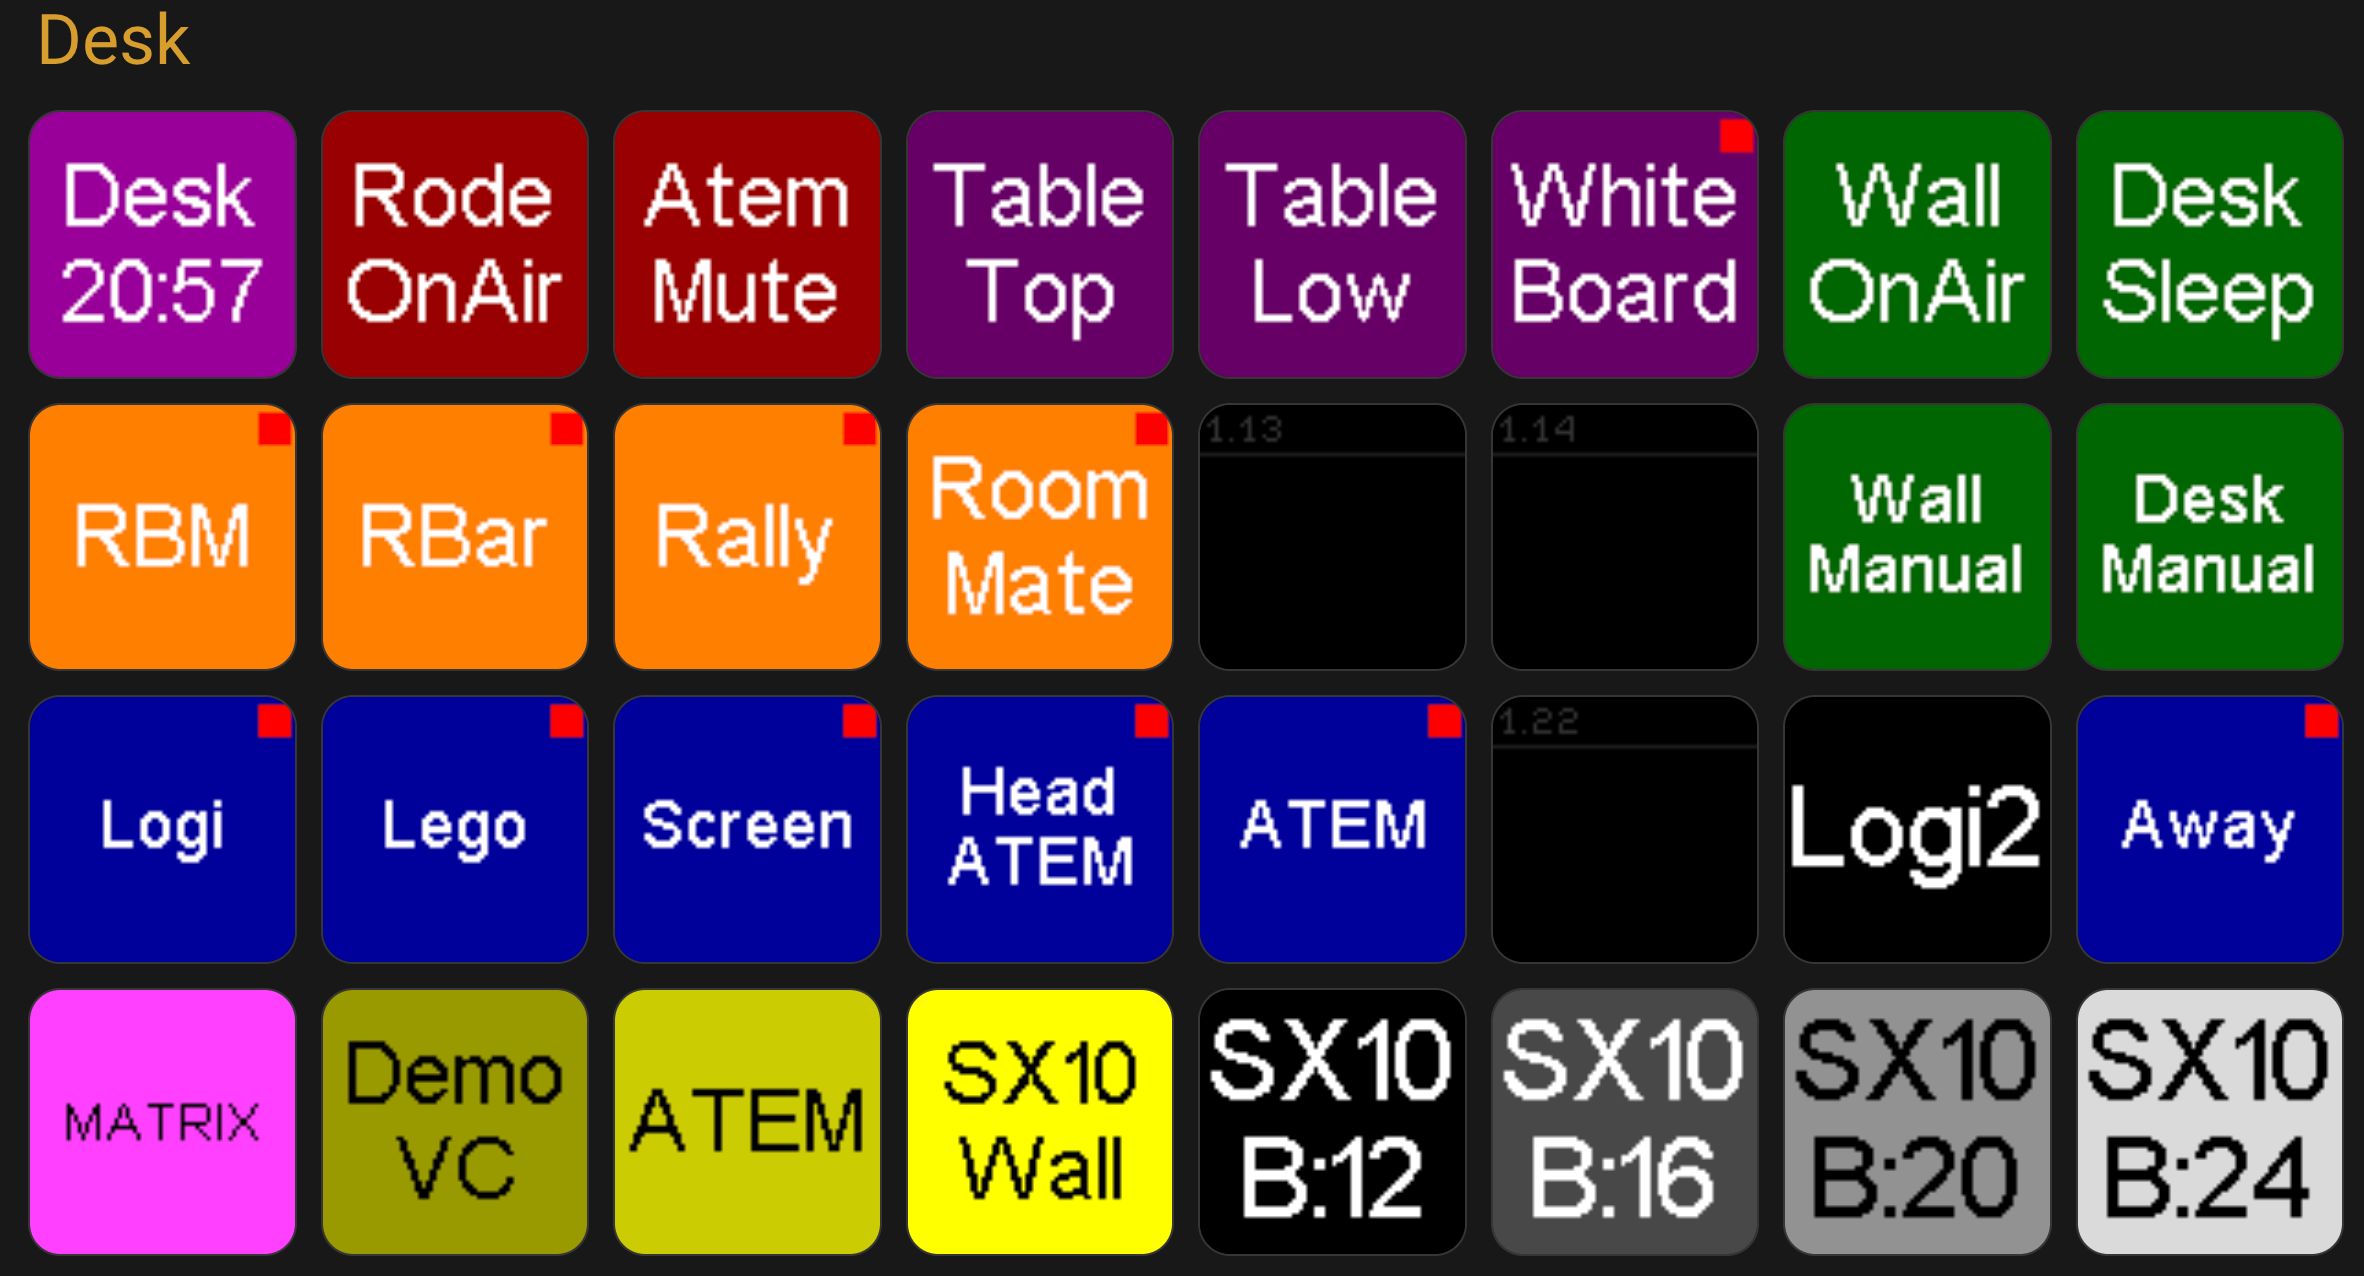 I use a Stream-Deck XL together with the companion app to control all the gear. I have about 8 Pages with buttons configured, but since I re-use many buttons over and over again, I have used some pages to park these, and only place references to the page in question. So when I change the source button, all others change automatically.
Also many colors change based on feedback of states, so this really makes is a lot more robust and flexible to design. I have by far not reached the end of my exploration in the Companion App, but I think I’m pretty good by now 😉
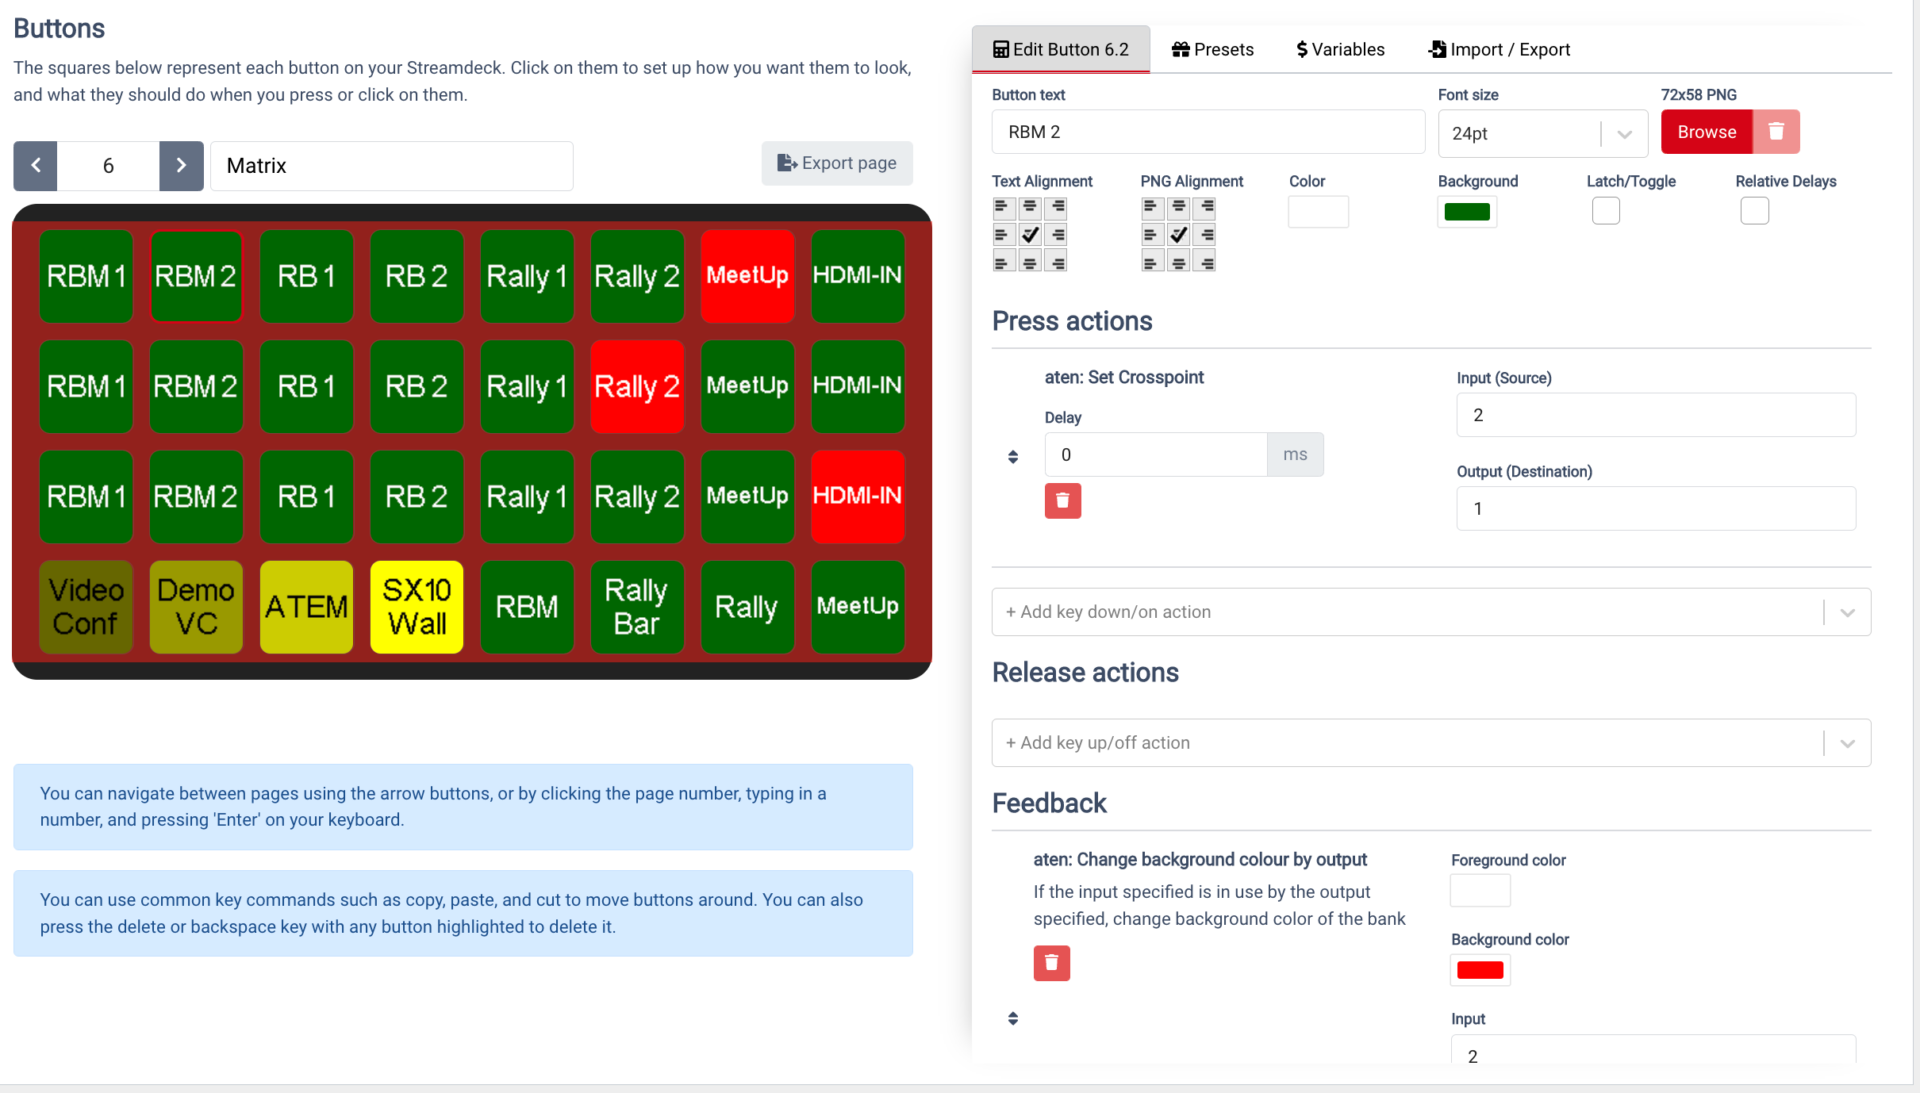
 Here you see an example of the Matrix I’ve built in the Companion App:
On the button press action, I set the Matrix, and the feedback action is to change the background to the active color, red, if the input is enabled. This way I always see which input is active, regardless where I changed the Matrix.
Configuration
Raspberry Pi4
On the Rasbperry Pi4 I run the custom build from Bitfocus, this takes care of all the updates for the companion app.
Update Companion App to 2.2, which is needed for the SX10 integration
companion-update
The Raspi4 has two HDMI outputs, which I would like to use for different tasks,
- One screen shall be used to play video content, especially together with the ATEM SouperSource feature, I can use this as animated background
- Screen two shall be used for the top-town webcam. This way I can capture what’s on my desk, for example the Logitech-Tab
Configuration on the Raspi4:
mplayer playing on the 2nd screen in Full-HD, and rotated by 180°:
pi@raspi4:~ $ alias webcam="mplayer -fps 30 tv:// -tv driver=v4l2:device=/dev/video1:width=1280:height=720 -xineramascreen 1 -fs -vf-add flip -vf-add mirror"
Start VLC automatically
alias vlclogi="vlc --fullscreen Raspi4/LogiBG_Colors.xspf"

nano /home/pi/.config/autostart/vlc.desktop
[Desktop Entry]
Type=Application
Name=VLC
Exec=vlc --fullscreen Raspi4/LogiBG_Colors.xspf

nano /home/pi/.config/autostart/webcam.desktop
[Desktop Entry]
Type=Application
Name=WEbCam
Exec=mplayer -fps 30 tv:// -tv driver=v4l2:device=/dev/video0:width=1280:height=720 -xineramascreen 1 -fs -vf-add flip -vf-add mirror
Sty tuned.. more to come 🙂